After learning the basics of making homemade soap, getting creative with designs, colors, and objects is a popular way to learn more about making personalized soaps. Just about any type of item can be placed inside a bar of soap, and the design ideas are only restricted by the soap maker’s creativity. The easiest way to add designs into soap is to use the “melt & pour” style of making soap.
pinterest.ru
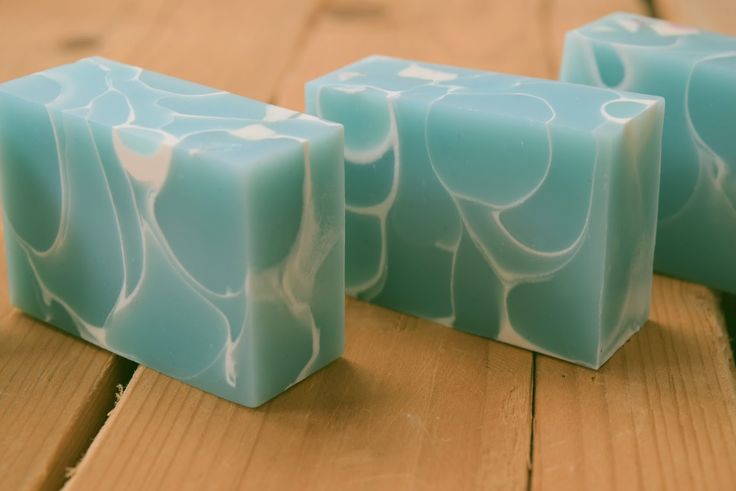
Adding Swirls into Soap
An advanced technique in soap making, creating swirls is an activity that might require some practice for the best results, but the nice thing is that even if the design is a little messed up, the soap is still usable, even if it turns out looking
a little strange. It’s also likely that some thought will need to be put into the colors used for a swirly soap, especially if it’s meant as a gift for a certain occasion or person.
Ingredients
“Melt & pour” ingredients for white bar soap
“Melt & pour” ingredients for each color of soap for the swirl
Large soap mold capable of holding around 15 bars
Large soap divider
Spatula
Steps
Create batches in separate containers of white soap and each of the colored
soaps
Add the swirl pattern of colors into the base of the soap mold (so the bottom
has a design!)
Carefully pour the white soap on top of the base swirl design
Pour the top layer of swirls on the soap (long, curved lines work well)
Insert a spatula into the mold until it hits the bottom and drag it through the
mold via the thin side
Insert a soap divider into the mold and allow the soap to harden as usual
Tip: For the best swirling results, make sure the consistency of each soap
color is similar
Adding Objects into Soap
One of the most popular ways to dress up a plain bar of soap is to put an item (like a tiny rubber ducky) into the soap for
fun. Holiday-themed items are terrific for soap gifted during Halloween or Christmas, and special items may also be placed inside soap meant as birthday gifts. As with other creative designs, using a “melt & pour” solution is often best for inserting objects into the soap. Consider also that an object doesn’t need to be smaller than the final soap size. It’s fine if part of the object sticks out of the side or out of the top as such a design can create a nice, artistic effect.
Ingredients
“Melt & pour” soap making ingredients
Small object (something plastic works well)
Soap mold in any size desired
Steps
Melt the soap solution
As with a regular bar of soap, add any color or scents desired
Pour a small amount of the soap into a mold
Position the item into the mold
Allow the soap to set for a few minutes
Add the rest of the soap to the mold
Allow the soap to harden and solidify
Adding Pictures into Soap
Adding a photograph or a picture into a bar of soap is a nice way to personalize the bars, and also opens up some very artistic avenues for creating fun soap.
Anything from newspaper clippings to magazine pictures may be used, as well as photographs and even hand-drawn pictures (handcrafted pictures should always be drawn with indelible ink).
Ingredients
Clear “melt & pour” soap making ingredients
Soap molds the size of each picture
Rubbing alcohol (in a spray bottle)
Pictures, photographs, or drawings for the soap
Steps
Melt the soap solution
Pour a short layer of the soap into the soap molds
Allow a few minutes of solidification of the soap
Spray some rubbing alcohol on soap
Immediately place the image (face down!) on the soap
Add the remaining soap solution to the mold
Allow the soap to harden
Tip: Some scents may change the color of a picture. Be careful when adding
scents to soap that feature pictures.
Adding Words or Impressions to Soap
Inserting a word, name, or message into a bar of soap is a creative option for a gift and is also very easy as there are a few different methods available for adding words to soap. One of the easiest ways is to use “melt & pour” soap and to stamp
the soap with a special soap stamp after it’s already been hardened a very short time in the mold.
Ingredients
“Melt & pour” soap solution in any color
Soap molds in any shape or size desired
Soap stamps of shapes or words
Steps
Melt the soap solution
Pour the entire amount of soap into the molds
Allow the soap to harden only as long as it takes to hold its shape
